Step 3 - Deploy a webchannel
Finally, you arrive at the last step of this tutorial : create a webchannel which can be used to test all you have done.
Channels are the different ways users can interact with your virtual assistant. You can enable or disable channels to control where your virtual assistant is available.
On this tutorial, we will focus on the creation of a web channel. Web/Mobile channel allows users to interact with your virtual assistant on the website of your choice. You can customize the appearance of the widget to match your website's design, and configure the behavior of the widget.
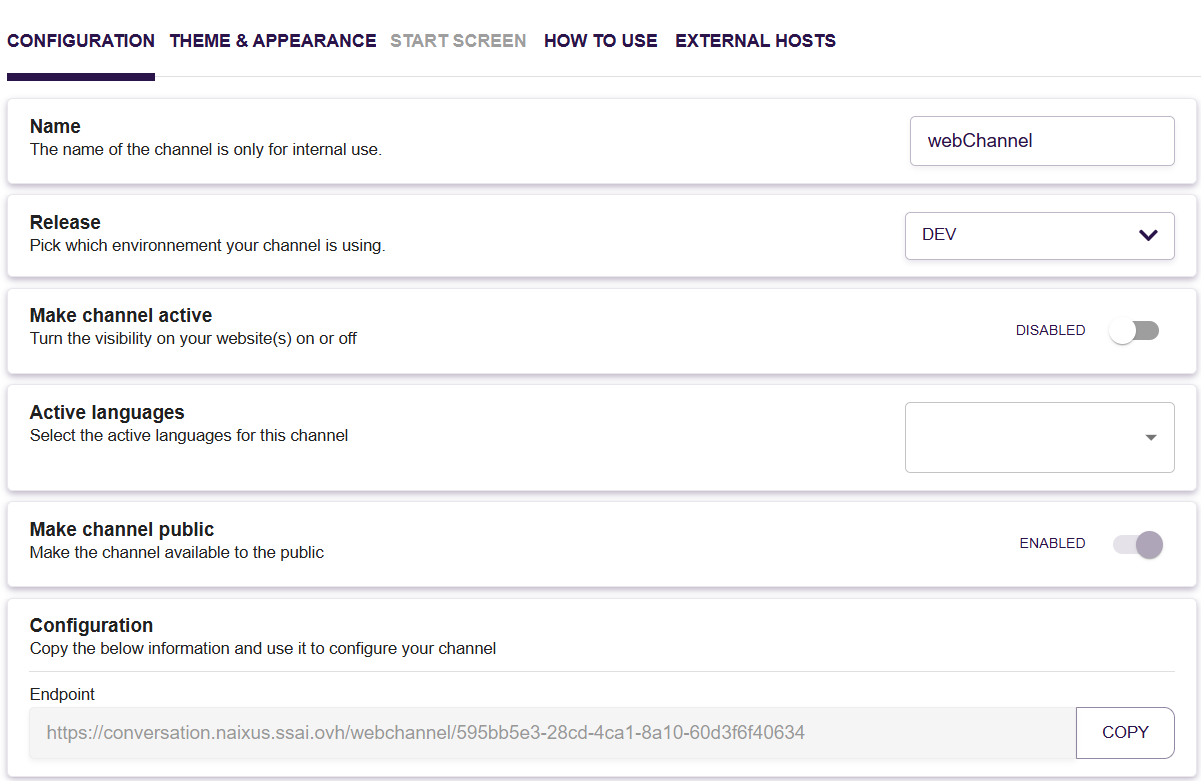
When creating your Web channel, you will need to fill some important informations:
- Name of the channel
- Release database your chatbot will use. As a first channel, you can proceed with the DEV release
- Make the channel active to be able to discuss with your chatbot
- Active languages of your webchannel, depending on your classifier
The endpoint URL of conversation will be displayed and you can open in a new tab your webchat.
Refer to the channel section for more informations on the different channels.